
To create a Magic Ink Reveal Tool
1. Draw a filled in shape with a thick border on the page. I will use a circle.

2. Move the shape to the Top Layer.

3. Use the Magic Ink to color in the shape. Get as close to the border as possible. This will become the inside of your Revealer Tool.

3. Draw another shape, but unfilled, around the Magic Ink. Line it up with the original shape. Make the border thicker than the original.

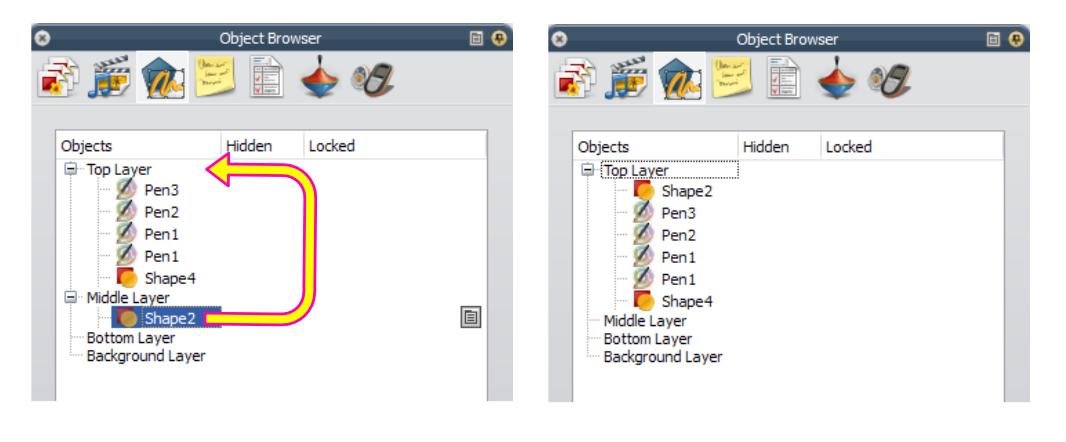
4. In the Object Browser Window, move this new, unfilled shape to the Top Layer, above the Magic Ink. (The other shape will disappear, hidden by this new shape.)
5. You don't need the original shape, so delete it using the Object Browser Window. Highlight the original shape, Click the Menu Icon, and select "Delete".

6. You now have a circle with the Magic Ink on the inside. To make it look like a Magnifying Glass, draw on a handle. Finally, select everything using the Select Tool and Group together. This makes it one image that can be moved around. Save the image in "My Resources" for future use.

7. Magic Ink Reveal Tool in use

**Remember, the Magic Ink Reveal Tool ONLY works on objects located in the Top Layer. To "see through" objects, you must move them to the Top Layer using the Object Browser Window. Place what you want to see on the Middle or Bottom Layers.***
No comments:
Post a Comment