Showing posts with label ActivInspire Tools. Show all posts

Sunday, December 12, 2010

Shape Tool - Adding Shapes in ActivInspire

Shapes, when filled with a color or as an outline only, can be used to create emphasis in a lesson.  Filled shapes can be used to cover answers and unfilled shapes can be used to highlight important information.


Shape Tool on the Toolbar


To create shapes (Click on image for larger view.)
     Step 1 - Select the Shape Tool (as shown above)
     Step 2 - Select the desired shape
     Step 3 - Select the fill color (the color of the inside of the shape.) If you only want an outline of a shape, select the X.
     Step 4 - Select the outline color
     Step 5 - Select the outine size


When you have selected all of the properties for your shape, draw the shape onto a page. To draw a shape, click and hold the mouse.  When you are happy with the shape, let go of the mouse click.  Practice adding a variety of shapes, filled and outline only.

Text Tool - Typing in ActivInspire

Text is often the basic element in a lesson.  But, by using the capabilities of ActivInspire, the text does not have to be boring.  After you learn to enter text into a page, you can manipulate it in a variety of ways.  Each text box can be easily moved around the page or highlighted using the paint bucket.  Also, you can attach actions to text to make note-taking and textbook exercises more engaging!

Text Tool from the toolbar
Typing text
Text is added to a Text Box.  Each text box can be moved and manipulated as an object.  I've found that it is best to use multiple text boxes within a page so that I can rearrange and change each piece of text to add variety and interest to a lesson.  Practice adding several text boxes to a page.  Just click in a new area in a page to add additional text boxes.

Changing Font and Text Size
The Text Tool bar, (shown below) allows you to change the text just as you would in other programs.   Highlight the text to be changed and use the tool bar to select a new font, a larger size, bold, italic or underline.


Moving Text Boxes 
When you have completed typing in text, use the Select Tool (shown below) to move the text boxes around the page.

ActivInspire Tools with Descriptions

Below is a brief overview of the some of the Tools and Commands available in ActivInspire.  (Click on images for larger views.)

Basic Tools with Descriptions (Click to enlarge)


Math Tools

Keyboard, Calculator, and Clock

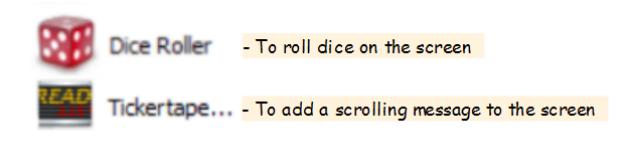
Dice and TickerTape

To make things 'Magically' appear and disappear (Click here to learn to use Magic Ink)

To reset page to last saved version

To record and control sounds


ActivVote Tools

To use two pens at a time

To Insert Blank Pages into a Flipchart


To clear a page


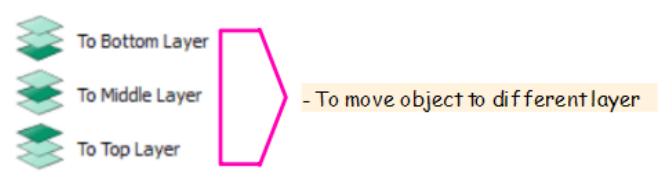
To move objects between layers 


 To move objects within a layer


To Align objects on a Flipchart Page

To reveal only a part of the screen when presenting

Menu Icons


To use ActivInspire Tools over the Desktop


Monday, October 4, 2010

Magic Ink Reveal Tool

A Magic Ink Reveal Tool can be created once and used for a variety of lessons. The main thing to remember when using Magic Ink is that it only works on objects located in the Top Layer of the page.

To create a Magic Ink Reveal Tool

1. Draw a filled in shape with a thick border on the page. I will use a circle.
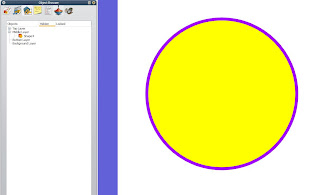

2. Move the shape to the Top Layer.
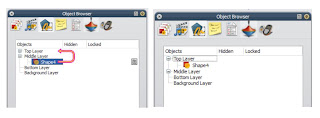

3. Use the Magic Ink to color in the shape. Get as close to the border as possible. This will become the inside of your Revealer Tool.


3. Draw another shape, but unfilled, around the Magic Ink. Line it up with the original shape. Make the border thicker than the original.
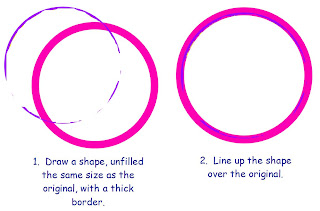

4. In the Object Browser Window, move this new, unfilled shape to the Top Layer, above the Magic Ink. (The other shape will disappear, hidden by this new shape.)
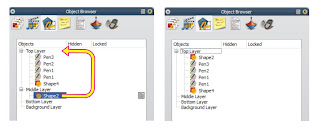

5. You don't need the original shape, so delete it using the Object Browser Window. Highlight the original shape, Click the Menu Icon, and select "Delete".
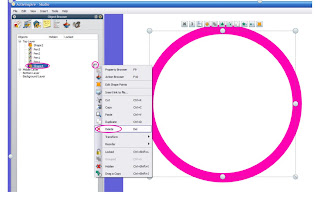

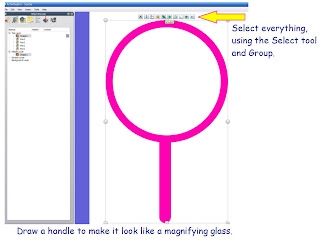
6. You now have a circle with the Magic Ink on the inside. To make it look like a Magnifying Glass, draw on a handle. Finally, select everything using the Select Tool and Group together. This makes it one image that can be moved around. Save the image in "My Resources" for future use.

7. Magic Ink Reveal Tool in use
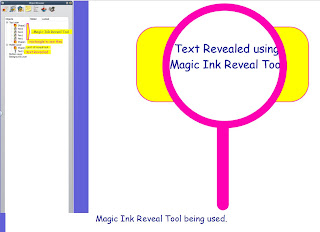

**Remember, the Magic Ink Reveal Tool ONLY works on objects located in the Top Layer. To "see through" objects, you must move them to the Top Layer using the Object Browser Window. Place what you want to see on the Middle or Bottom Layers.***

Magic Ink

Magic Ink can be used to 'see through' objects located in the Top Layer of a page. Magic Ink only works on objects located in the Top Layer of a page, so the images you want to 'see through' must also be located in the Top Layer.  When you color with the Magic Ink over an object in the Top Layer, everything in the Middle and Bottom layers is revealed. (Click here to learn to make a Magnifying Glass Magic Ink Reveal Tool)

To see the layers of your page, use the Object Browser Window. (Click here for help finding the Object Browser Window.)

You will need 2 objects for this tutorial. I will use a rectangle and text. The Magic Ink will be used to 'see through' the rectangle to the text.

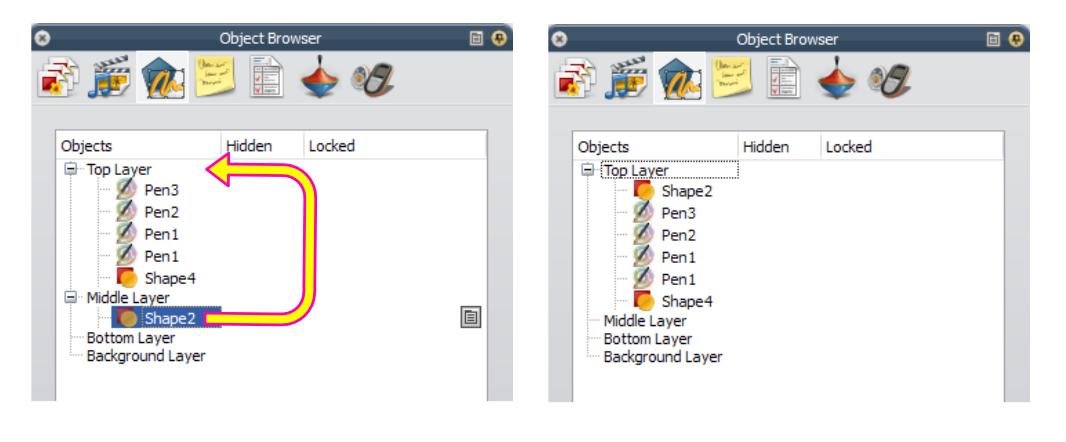
1. Objects (shapes, images and text) default to the Middle Layer. Since Magic Ink only works on objects in the Top Layer, you must first move the shape to the Top Layer by dragging and dropping it in the Object Browser Window. (Click on images for larger views.)


2. In the workspace, place the shape over the text.


3. Click on the Magic Ink Tool.


4. Using Magic Ink, color over the rectangle and the text will appear!


This is an interesting way for students to discover answers or helpful hints during a lesson.

Saturday, September 25, 2010

ActivInspire Camera Tool (Inside ActivInspire)

Using the camera to take pictures inside of ActivInspire.
(Click here learn to take pictures OUTSIDE of ActivInspire)


1.  Select the Camera Tool from the toolbar.  (Click on image to enlarge.)


2.  Select "Area Snapshot".  (You have other options:  "Point to Point Snapshot - you can capture around the image shape;  "Freehand Snapshot" - you can draw around an image shape; "Window Snapshot" - captures image of just ActivInspire window;  "Fullscreen Snapshot" - Captures everything on your screen at that time.)


3.  The screen will go gray leaving you with a highlight box to drag and reshape around image you want to capture.  

4.  When you are ready to capture the image, choose "Current Page" on "Camera Snapshot" Box that is on the screen.  This will add the image to the current page you are working on in ActivInspire.  (You have other options:  "New Page" - add image to new page; "Clipboard" - to use later; "My Resources" - to save as file; "Shared Resources" - to share as file.)


5.  The image will be on the same page to be resized and moved however you want! 


ActivInspire Camera Tool (Desktop Tools)

Using the camera to take pictures outside of ActivInspire.
(Click here to use the Camera Tool INSIDE ActivInspire)


1.  Find the image you want to capture.  (You can capture images from anywhere. From the web, from your documents...etc.)

2.  Go to ActivInspire and click on Desktop Tools, circled in pink below.  (Click on image for larger view.)

3.  ActivInspire will disappear leaving you with something like the image below. The Desktop Tools Icon will be on the screen.  (Click on image to enlarge.)


4.  Hover over the Desktop Tools Icon and it will expand.  Hover over the Camera Icon and it will expand once more.  Hover over the Area Snapshot Icon and click to use the tool. (Click on image to enlarge.)


5.  The screen will go gray.  Drag and reshape the area box around image you want to capture.


6.  When you are ready to capture the image, choose "Current Page" on "Camera Snapshot" Box that is on the screen.  This will add the image to the current page you are working on in ActivInspire.  (You have other options:  "New Page" - add image to new page; "Clipboard" - to use later; "My Resources" - to save as file; "Shared Resources" - to share as file.)


7.   You can take as many pictures as you would like, adding each to the current page.  When you are ready to go back to ActivInspire, click on "Return to Flipcharts" on the Desktop Tool Wheel.


8.  Your image(s) will be in your flipchart when you return.  Images can be resized and moved however you would like!